The timeline editor holds everything about a wedding day: the blocks that make up the schedule, the notes attached to each one, and the coverage window that marks your booked hours against the rest of the day. Your first timeline covers the basics of getting a day built. This article covers how the editor itself works.
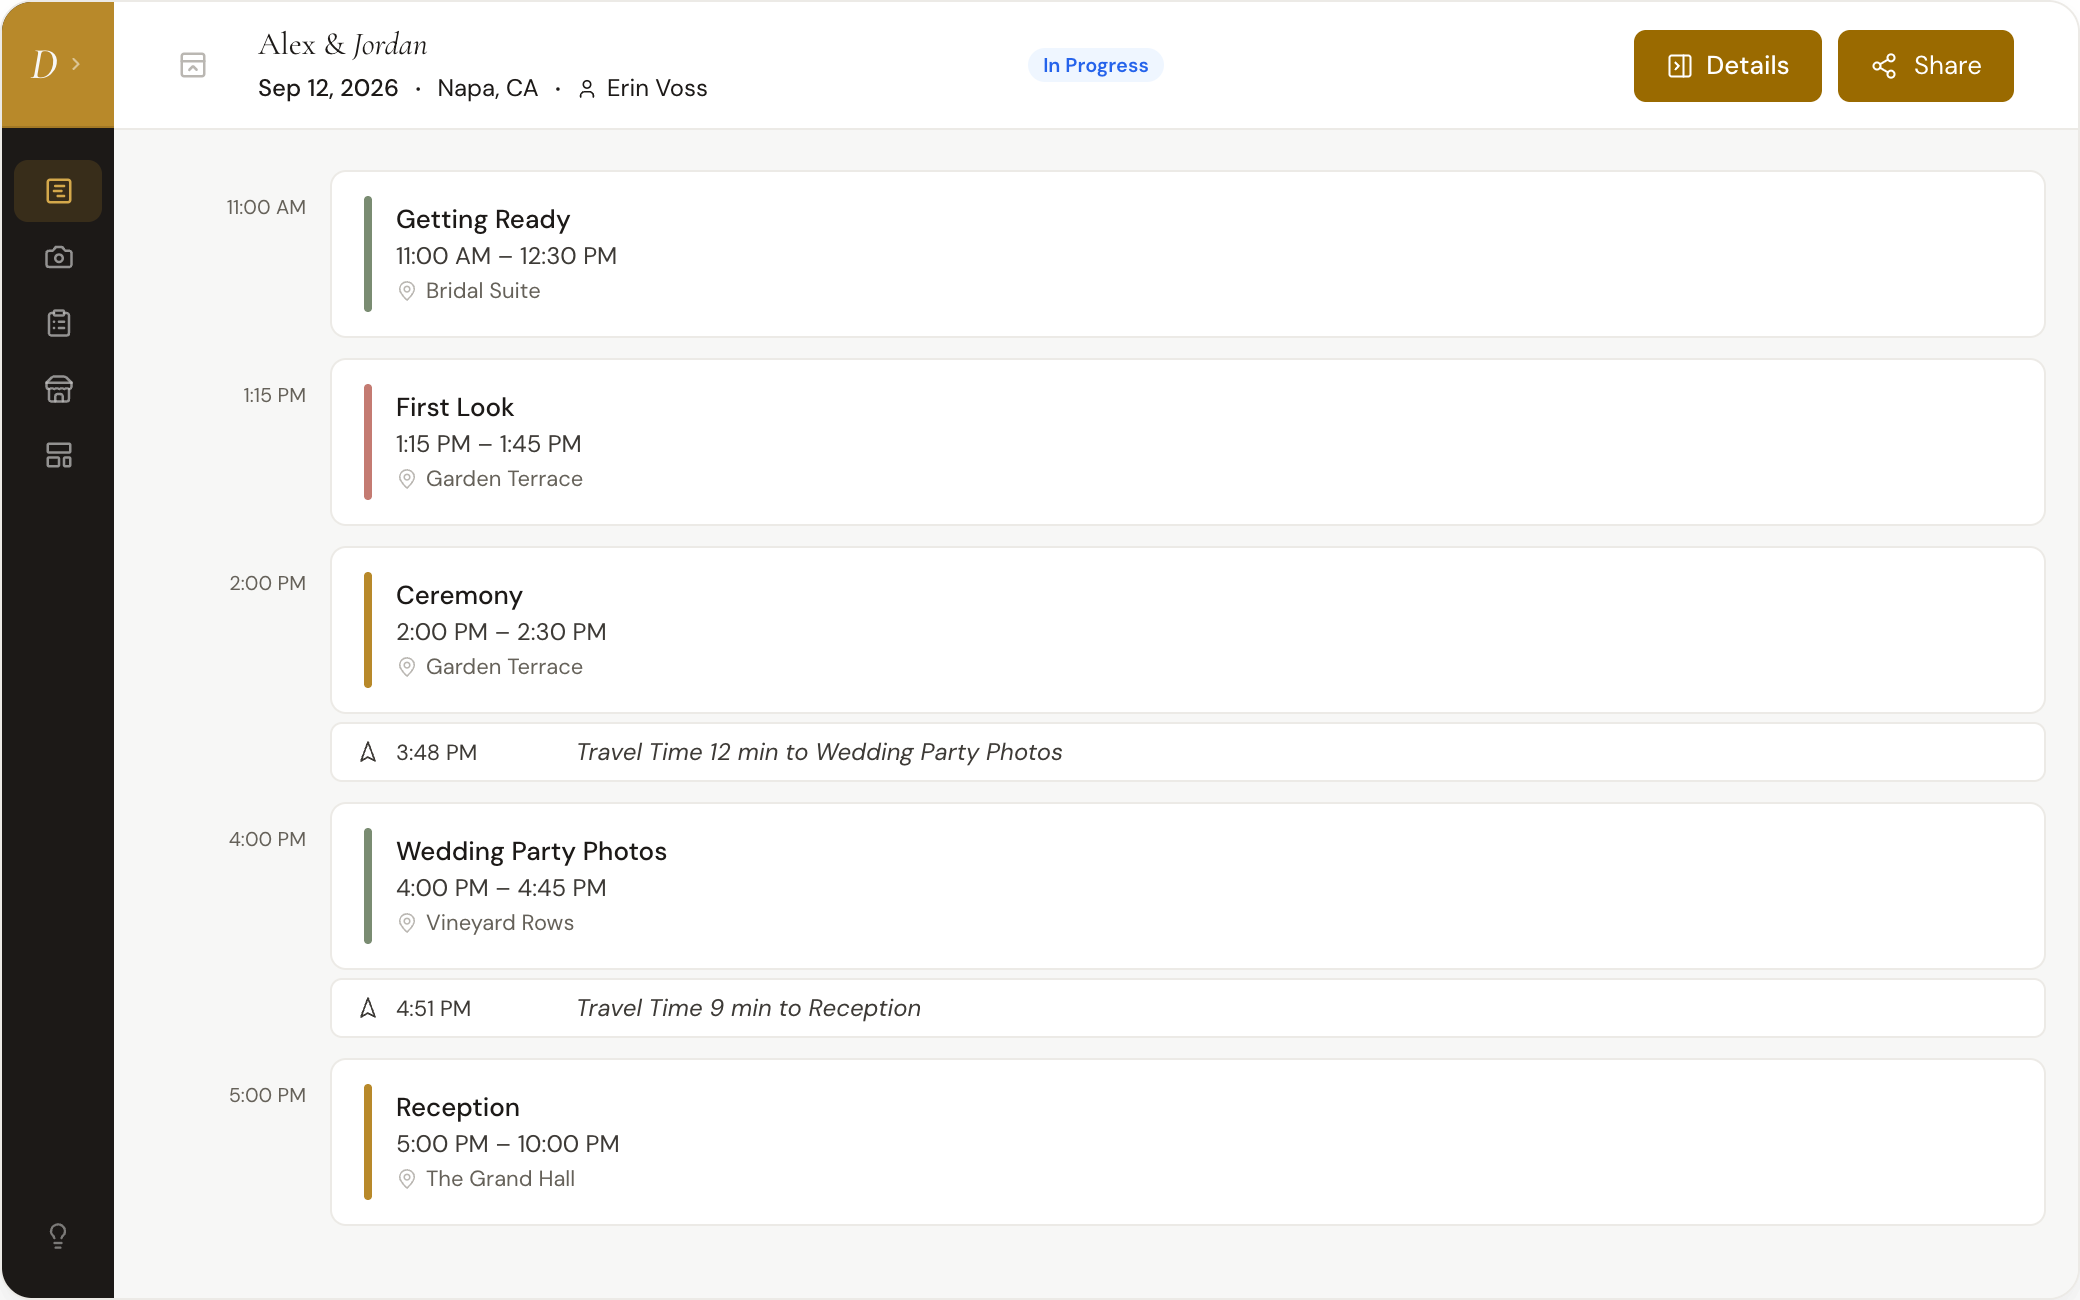
The agenda view
A timeline opens in the Agenda view: the day as a list, first block to last, with each block's start time in the margin and the golden hour, sunset, and coverage markers threaded through at their own times.
The block palette runs along the side, one row per event type: Getting Ready, First Look, Portraits, Wedding Party Photos, Family Photos, Ceremony, Cocktail Hour, Dinner, Reception, Party Bus, Travel, and Buffer / Break. Drag a row into the list and the gaps between blocks light up as drop targets. You can also skip the drag: hover any gap and a plus appears, and clicking it opens a picker for the block type. Until the day has a Ceremony block, Ceremony sits on its own at the top of both the palette and the picker, highlighted in gold. Once you place one, it rejoins the list in day order.
Either way, the new block's times come from its neighbors. Drop it above an existing block and it ends where that block starts, so it tucks in cleanly. Drop it after the last block and it starts where that block ends. The very first block on an empty day opens its editor with placeholder times, ready for you to type the real ones.
To move a block, click it to select it, then press the up or down arrow keys. Each press proposes a fifteen-minute shift, earlier or later, and the timeline asks you to confirm before anything is saved. Shift-click to select a run of blocks and move them together, or use Select all (or ⌘A) to select every block. Sections are selected one at a time. To change one block's schedule precisely, click its start or end time and type the new one. Clicking a block's title, location, note, or subtask opens the editor with that field ready to type into; clicking the empty part of a block selects it instead.
On a phone, tap Select at the top of the timeline, then tap the blocks to move. To move one block, you can also open it and tap Move at the top. To stop selecting, tap Done or an empty part of the timeline. Earlier and Later move them 15 minutes at a time, and nothing is saved until you tap Move. Delete removes the selected blocks after you confirm.
On a computer or a phone, a block that ends at midnight keeps its midnight end when the day moves later, so it gets shorter instead of running past the end of the night.
Times and durations
You never type a block's duration directly. Duration is always the gap between the block's start and its end; move either edge and the duration follows, and the block editor shows the result next to the end time. The end-time field in the block editor accepts shorthand: type 230 after a 2:00 start and it reads as 2:30. Type a bare hour like 9 and it reads as whichever of 9 AM or 9 PM falls after your start time, rather than defaulting to whichever comes first.
Notes and subtasks
Every block has two note fields, and they behave differently:
- Notes travel with the block wherever it's seen: in your account, and by the couple if the block itself is visible to the couple.
- Internal notes stay inside your studio. They never appear on the share link or the exported PDF, no matter how the block's visibility is set. Use them for a vendor contact, a parking note, or anything else you'd rather not put in front of the couple.
Sections are untimed headers that divide the day, such as "Evening", with an optional description and checklist the couple can see. To add one, choose + Section when you add a block. To move one, use the arrows beside it on a computer; on a phone, open it and tap Move at the top, then use the arrows and tap Move again. Delete a section from inside it.
Subtasks break a block into smaller steps. Each subtask can carry its own time or stay untimed. Untimed subtasks list first, followed by timed ones in order. Travel time between locations shows up here too: when you place a block with a location next to another timed block that also has one, Daymarked offers to add a travel subtask between them. Travel subtasks always sort to the bottom of the list, so they read as connective tissue between stops rather than a task in the day.
On a phone, each block in the timeline shows its sub-tasks and notes, the same as the collapsed block on a computer.
The coverage window
Coverage is the window of hours you're actually booked to shoot, and it's separate from the full day on the timeline; a wedding can run well past what you're covering. You enter the number of coverage hours when you create the wedding, but the window itself doesn't appear until you place a Ceremony block with a start time and place the window. A nudge invites you to place it once the block is in.
Placing the window centers it on the ceremony's start time. It appears as "Coverage" and "Coverage ends" marker rows at the right points in the list. To adjust the hours or the exact start and end, click either coverage marker to reopen the coverage editor.